Jupyter™ Notebooks is one of the most popular IDE of choice among Python users. Traditionally, Jupyter users work with small or sampled datasets that do not require distributed computing. However, as data volumes grow and enterprises move toward a unified data lake, powering business analytics through parallel computing frameworks such as Spark, Hive, and Presto becomes essential.
We covered connecting Jupyter with the Qubole Spark cluster in the previous article. In this post, we will show how Jupyter users can leverage PyHive to run queries from Jupyter Notebooks against Qubole Hive and Presto clusters in a secure way.
The following diagram depicts a high-level architectural view of the solution.
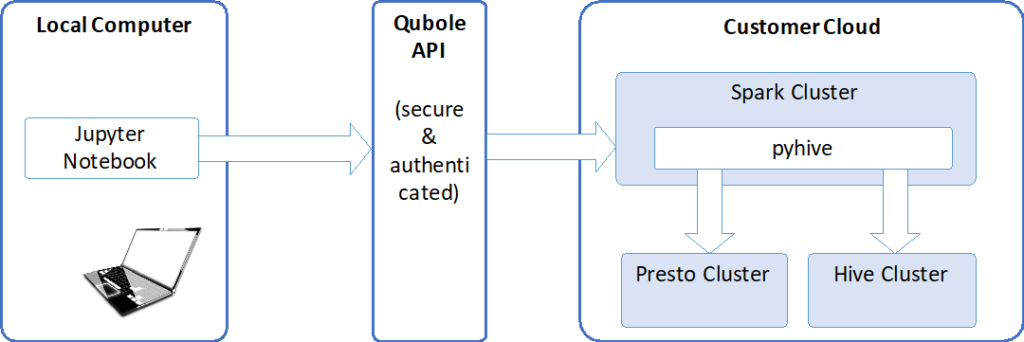
A Jupyter Notebook that is running on your local computer will utilize Qubole API to connect to a Qubole Spark Cluster. This will allow the notebook to execute SQL code on Presto or Hive Cluster using Pyhive. Please follow the Step-by-Step Guide below to enable this solution.
Step-by-Step Guide
Step 1. Follow the steps in this article to connect Jupyter with Qubole Spark Cluster.
Step 2. Navigate to the Clusters page in Qubole & click the ellipsis on the same Spark cluster you used on the previous step. Click “Edit Node Bootstrap”.

Step 3. Add the following command to the Node Bootstrap outside of any conditional code to make sure that this command runs for both, master and slave nodes.
pip install pyhive
Step 4. Start or Restart the Spark cluster to activate Pyhive.
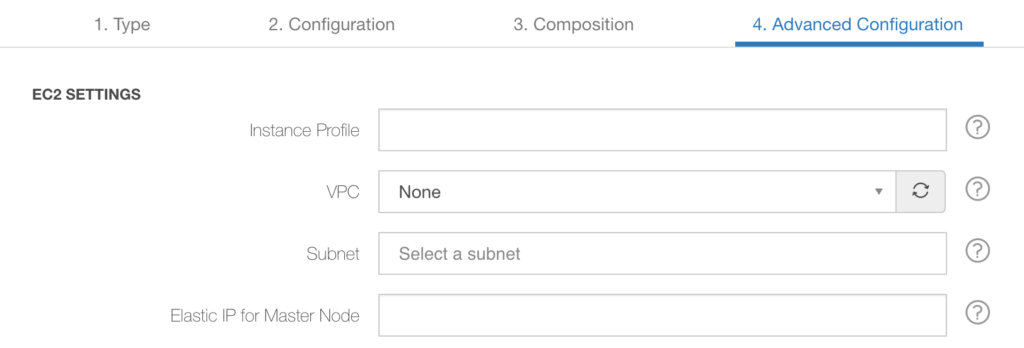
Step 5. Set Elastic IP for Master Node in the cluster configuration for both Hive and Presto clusters. This step is optional. However, it will help to reconnect to Hive and Presto clusters after their restart.
Step 6. On Hive cluster, enable Hive Server 2

Step 7. Make sure that port 10003 on the master node of the Hive cluster and port 8081 on the Presto cluster are open for access from the Spark cluster. You may need to create security groups and apply them as Persistent Security Groups on the cluster configuration.
Step 8. Start or restart Hive and Presto clusters and take a note of the Master DNS on the Clusters page. If you configured Elastic IPs on Step 5 use them instead. Here is an example of how the Master DNS may look.

Step 9. Start Jupyter Notebook and open an existing or create a new PySpark notebook. Please refer to this article for details of starting the Jupyter Notebook.
Step 10. To connect to Hive, use this sample code below. Replace <Master-Node-DNS> with the values from Step 8.
from pyhive import hive

hive_conn = hive.Connection(host="<Master-Node-DNS>", port=10003)

hive_cursor=hive_conn.cursor()

hive_cursor.execute('SELECT * FROM your_table LIMIT 10')

print hive_cursor.fetchone()
Step 11. To connect to Presto, use this sample code below. Replace <Master-Node-DNS> with the values from Step 8.
from pyhive import presto

presto_conn = presto.Connection(host="<Matser-Node-DNS>", port=8081)

presto_cursor=presto_conn.cursor()

presto_cursor.execute('SELECT * FROM your_table LIMIT 10')

print presto_cursor.fetchone()