With the recent announcement of Dashboards, we at Qubole want to make sure that our customers have everything that they need to succeed with using that feature. With that in mind, we crafted a step-by-step guide to help you get your first Dashboard up and running.
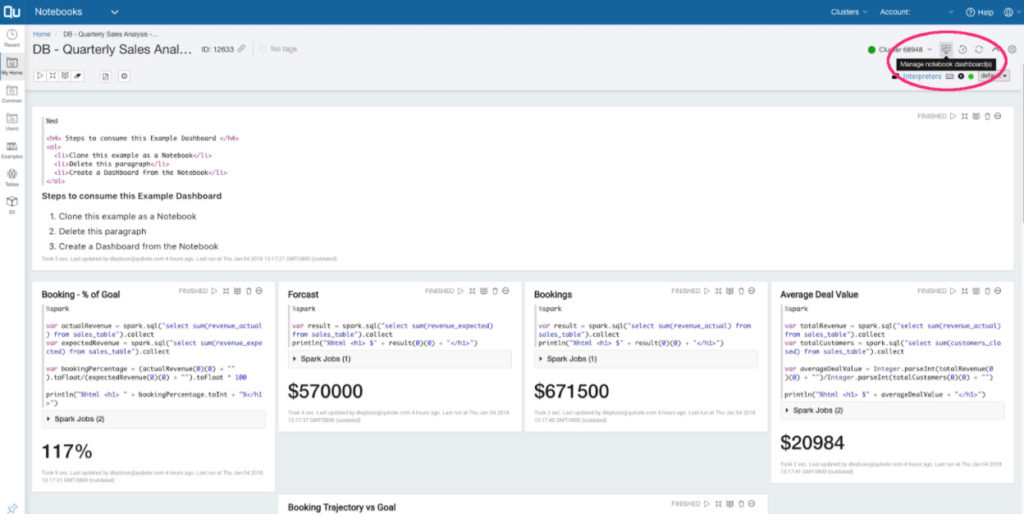
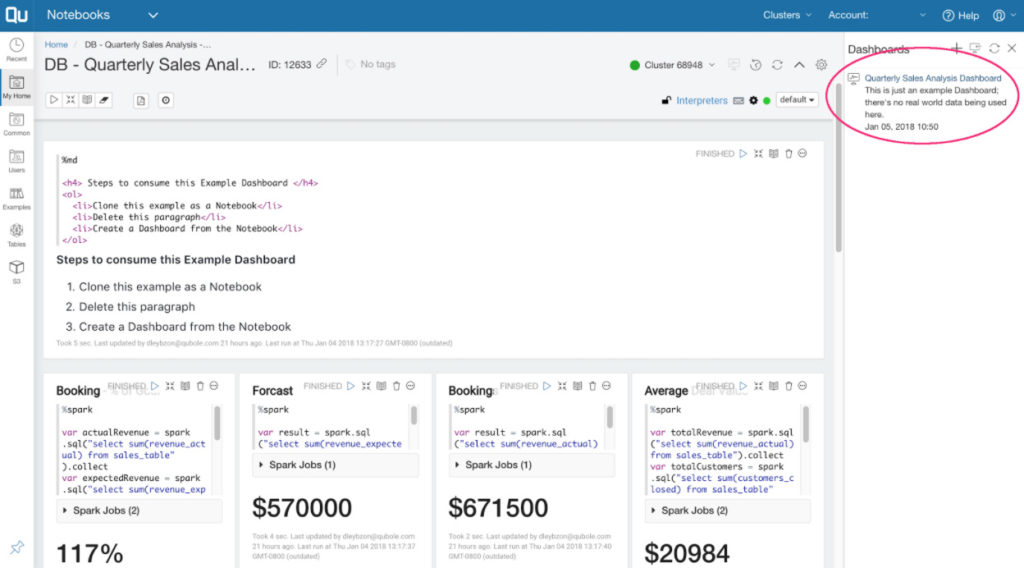
- After you’ve created a Notebook, turning it into a Dashboard is easy. To begin with, click the “Manage notebook dashboard(s)” button visible in the red oval in this screenshot:
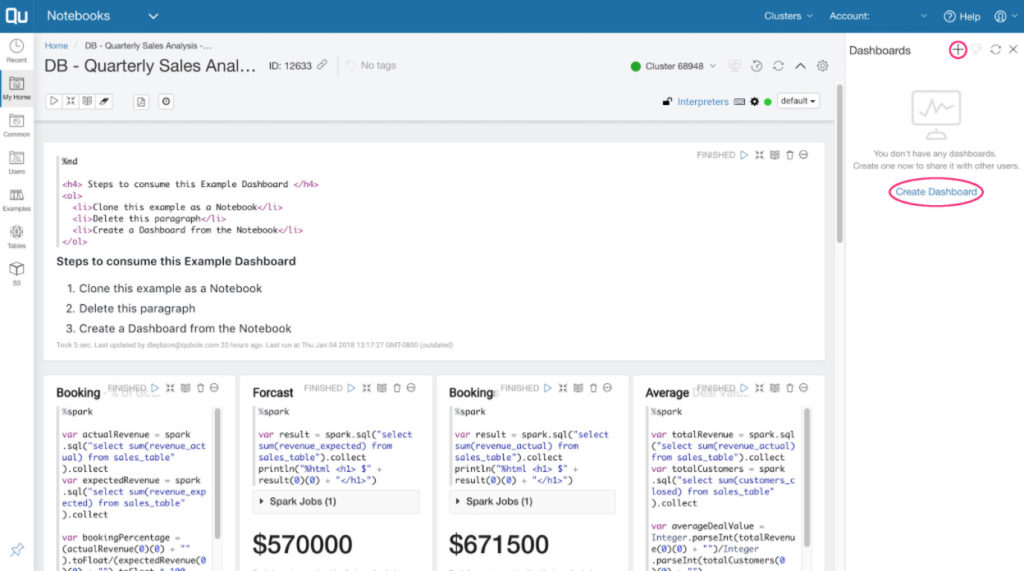
- Once you’ve clicked that, the Dashboards tab will open on the right-hand side of the screen. From that tab, to turn your Notebook into a Dashboard, click the plus sign or the “Create Dashboard” link:

- After you click either the button or the link, a popup will appear which will allow you to enter the basic information of the Dashboard:
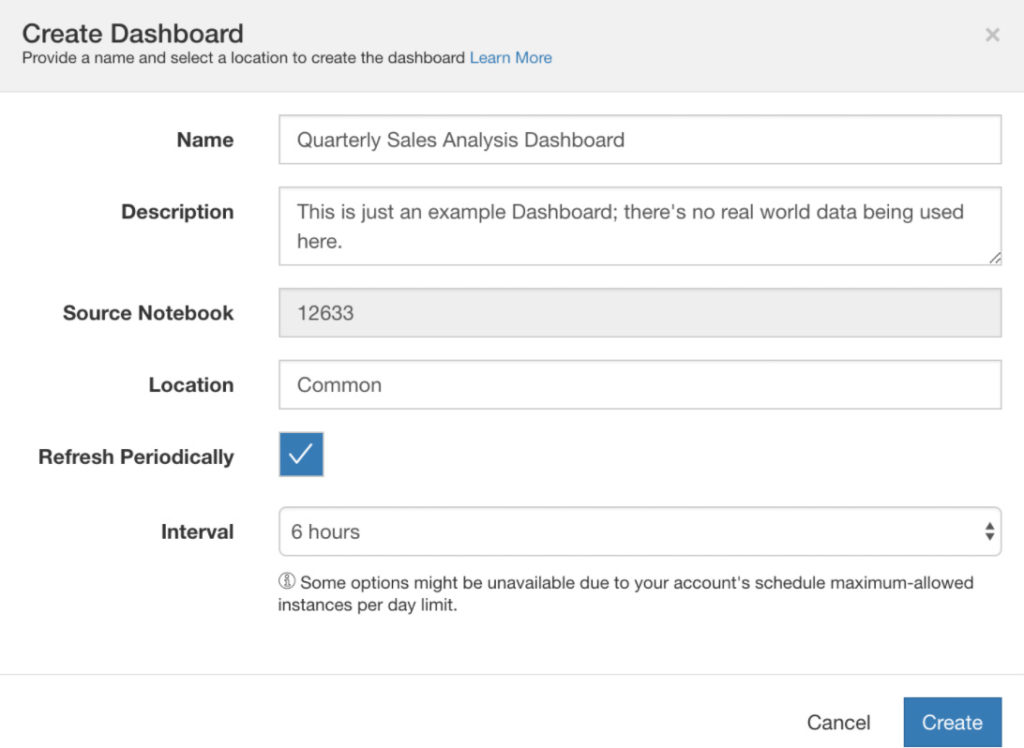

In addition to the basic Name, Description, and Location inputs, you can also choose to have the Dashboard automatically refreshed at a regular interval.
- Once you’ve clicked the Create button the Dashboards tab on the right-hand side of the screen will have a new item for the Dashboard you’ve just created.

- Once you click on the link from that new item, you will be brought to the screen that contains your new dashboard.
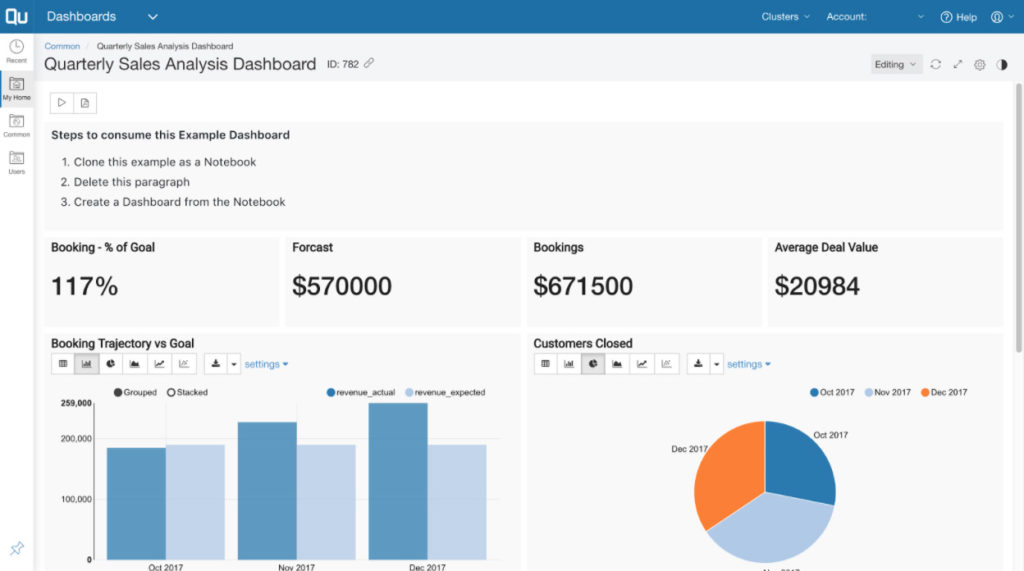
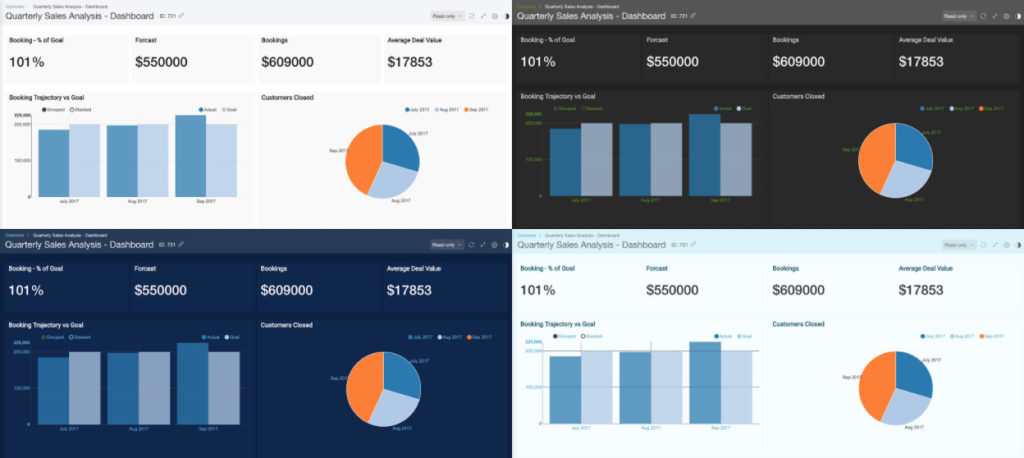
Voila! There’s your Notebook, now repackaged as a beautiful Dashboard for easy consumption by your business users. You can use the circle icon next to the gear icon to play around with different color themes: Light, Slate, Dark Blue, or Cyan.
If you have any questions about setting up your Dashboard, please contact [email protected] or if you have any feedback on how we can make the product better please let us know at [email protected]